4 Steps to Secure Your Data with AWS Backup and Open Raven

The Open Raven integration with AWS Backup marks a first in bringing data intelligence and infrastructure configuration together with backup visibility. Why is this important? Well, when it comes to business impact analysis (BIA), security, or disaster recovery (DR) plans, the ability to quickly recover when preventative measures fail is key. This is especially true given the prevalence of ransomware. The hands-free integration allows teams to automate enforcement of backup policies across their AWS organization to ensure that all critical resources and data are available for recovery when the need arises. On the map, users can immediately see which resources have or do not have active AWS backup plans, click through to see backup history, and add or change applied backup plans as necessary—all within the Open Raven platform.
Creating a Ransomware Recovery Plan
Creating a ransomware recovery plan is fairly similar to historical best practices with a few updates. For instance, backups should:
- Include all critical resources and sensitive data.
- Be available for recovery in the event your production environment or accounts are unavailable.
- Be quickly recoverable to minimize downtime (restore time objective, RTO).
- Run frequently enough to avoid data loss (restore point objective, RPO).
- Be encrypted at rest to avoid theft and tampering.
It sounds simple enough, but the challenge in backup and DR has always been first knowing what you have, where, and ensuring any changes in infrastructure or data are quickly accounted for. In the cloud, these problems are even more challenging due to the velocity, variety, and volume of data creation and sprawl. Here’s how we make it easy for teams to ensure backups satisfy such requirements:
Step 1. Connect to auto-discover and map your assets
Being cloud-native, there is no deployment of services, just a connection made between your AWS account and the Open Raven platform. We offer a simple guided connection requiring a read-only AWS account as well as manual options via CloudFormation or Terraform. Select the account avatar in the navigation menu and click on Settings. Once connected, the automated discovery and mapping of your native and non-native resources will begin.
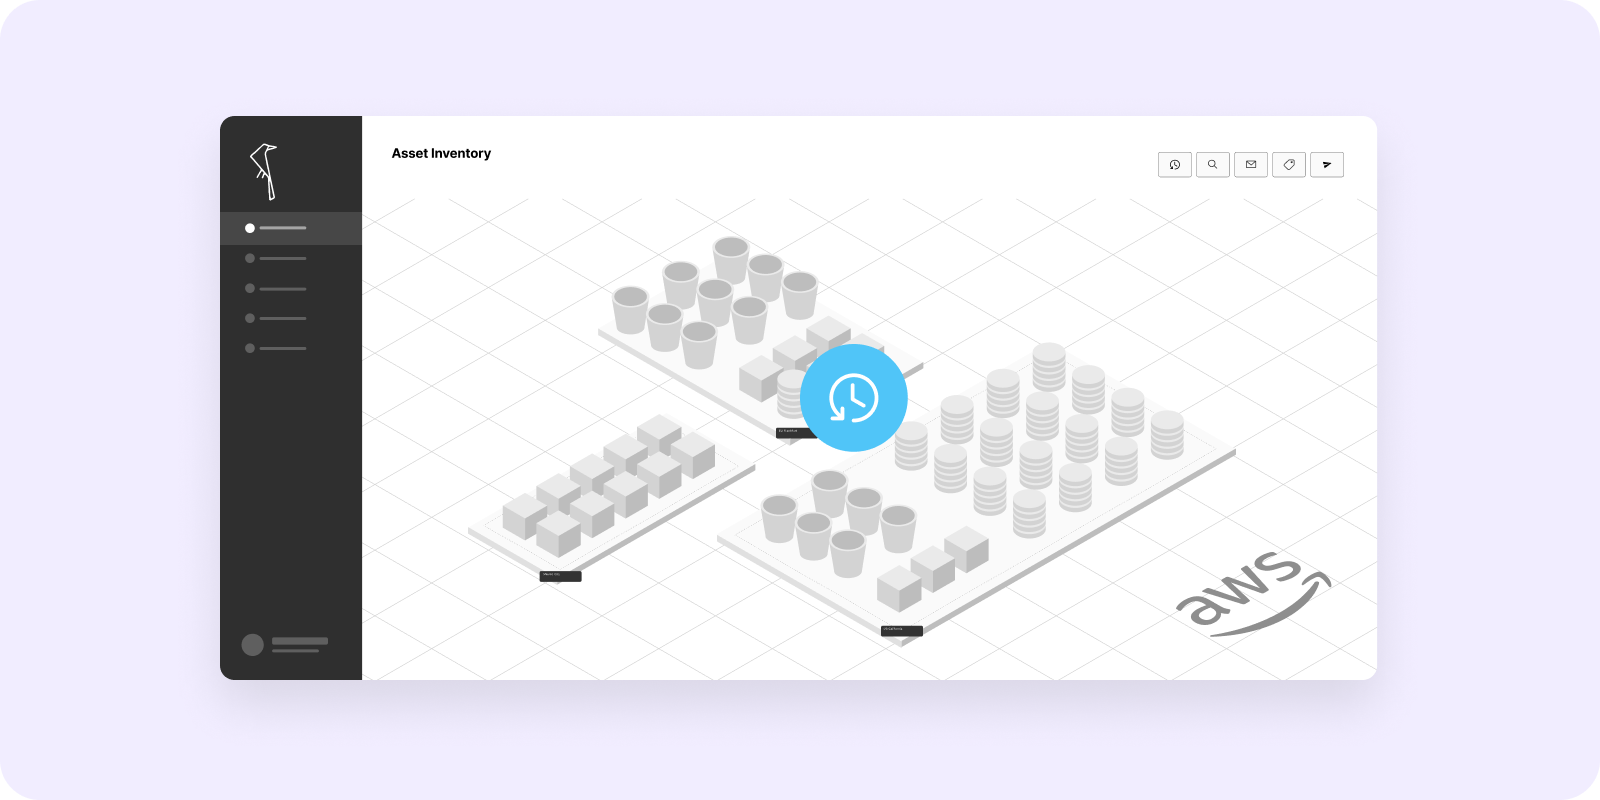
The results are visible in an interactive map (above) as well as an exportable asset list.
Step 2. See what’s protected
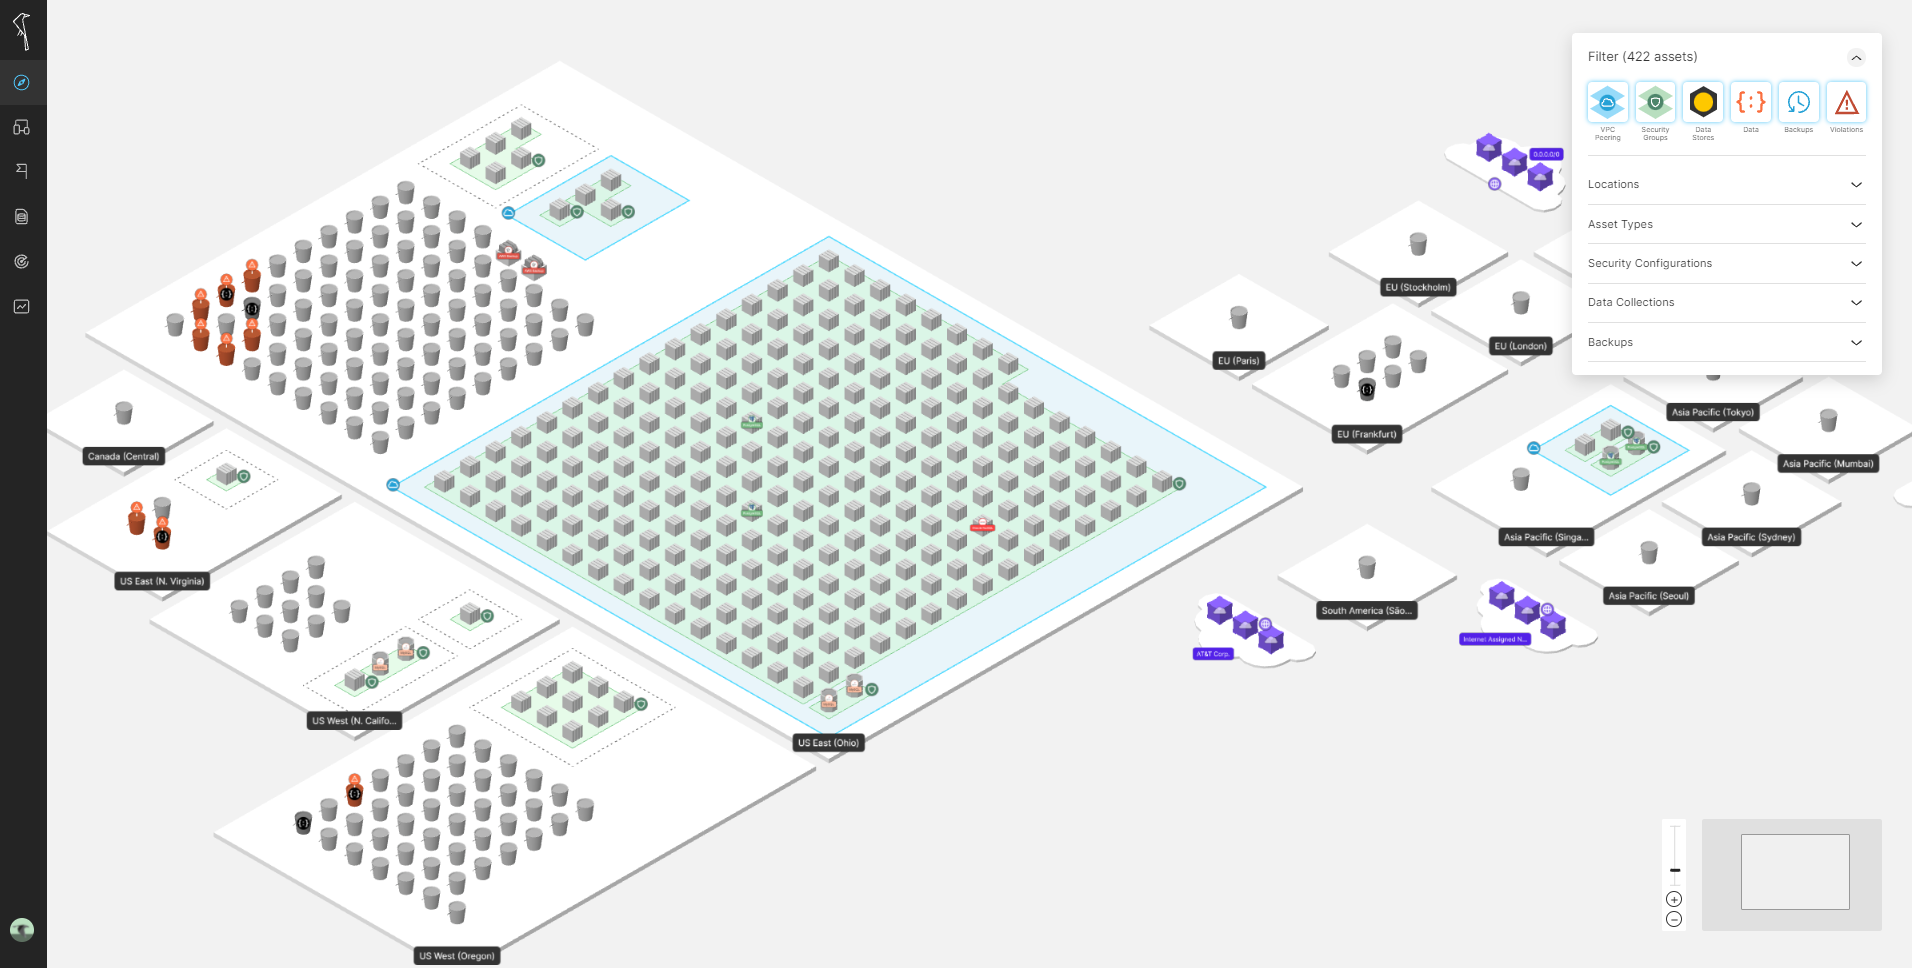
Use the backup filter on the top right part of the Maps page (or in the Asset List) to see which resources do and do not have backups. By selecting an asset on the map, a details screen will provide information gathered during the discovery and mapping step, including backup plan and status details.

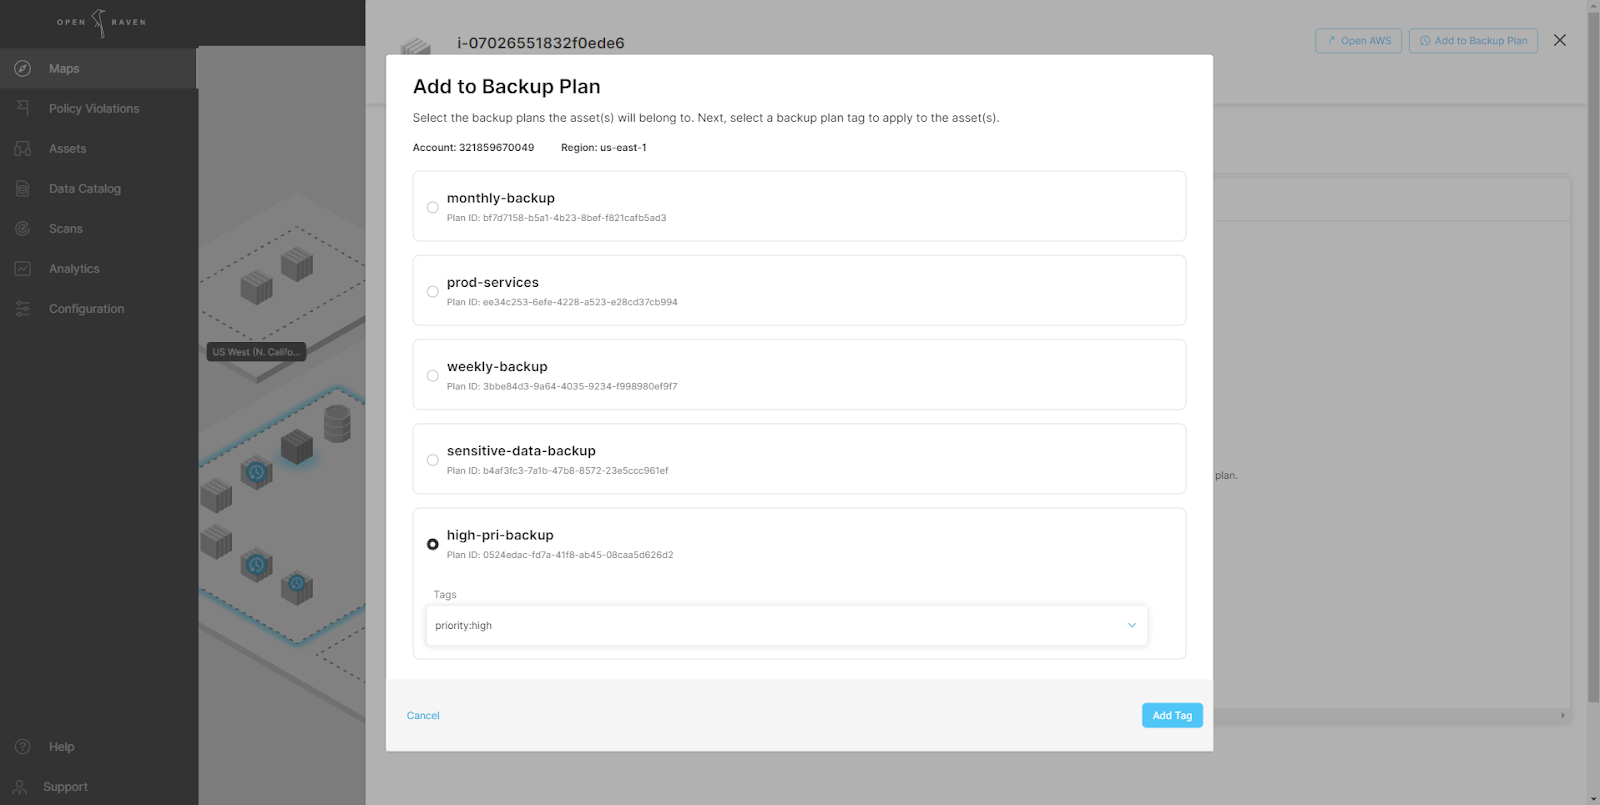
The asset above has no active backups. By selecting the ‘Add to Backup Plan’ button available AWS Backup plans can be easily added without switching to the AWS Console.
Step 3. Scan for Sensitive Data Types
Data Scans search for instances of sensitive data types using over 150 default classes, and counting, that are organized into Data Collections for easy management. Data Collections can be modified or created by selecting Data Catalog and then Data Collections in the navigation menu. When modifying a collection, users are presented with a screen that shows available data classes on the left, and the included classes on the right, with the option to move classes in and out of the Collection.
Once you have a default or customized Data Collection ready, use the left-side menu to mouse-over Scans, then select Data Scans. Scans require selecting a schedule (one-time or recurring), data collection(s) to be scanned for, and a target range of resources to be scanned. Resources can be selected by various attributes, including region, account, name, or configuration to provide the flexibility to meet your needs.
Fundamentally, knowing the type and instance count of sensitive data on your resources will shape backup and recovery plans, ensuring forgotten or misplaced data is not left without protection. In addition, such intelligence will help identify opportunities for consolidation and streamlining of backup and recovery plans. For example, if we find that personal data exists across many S3 buckets, it may be useful to consolidate. Finally, in the event of an outage or loss, having a detailed data inventory helps prioritize recovery steps as users can quickly identify both the sensitive data involved and recovery options as provided from the AWS Backup integration.
Step 4. Automate alerts for resources or data without backups
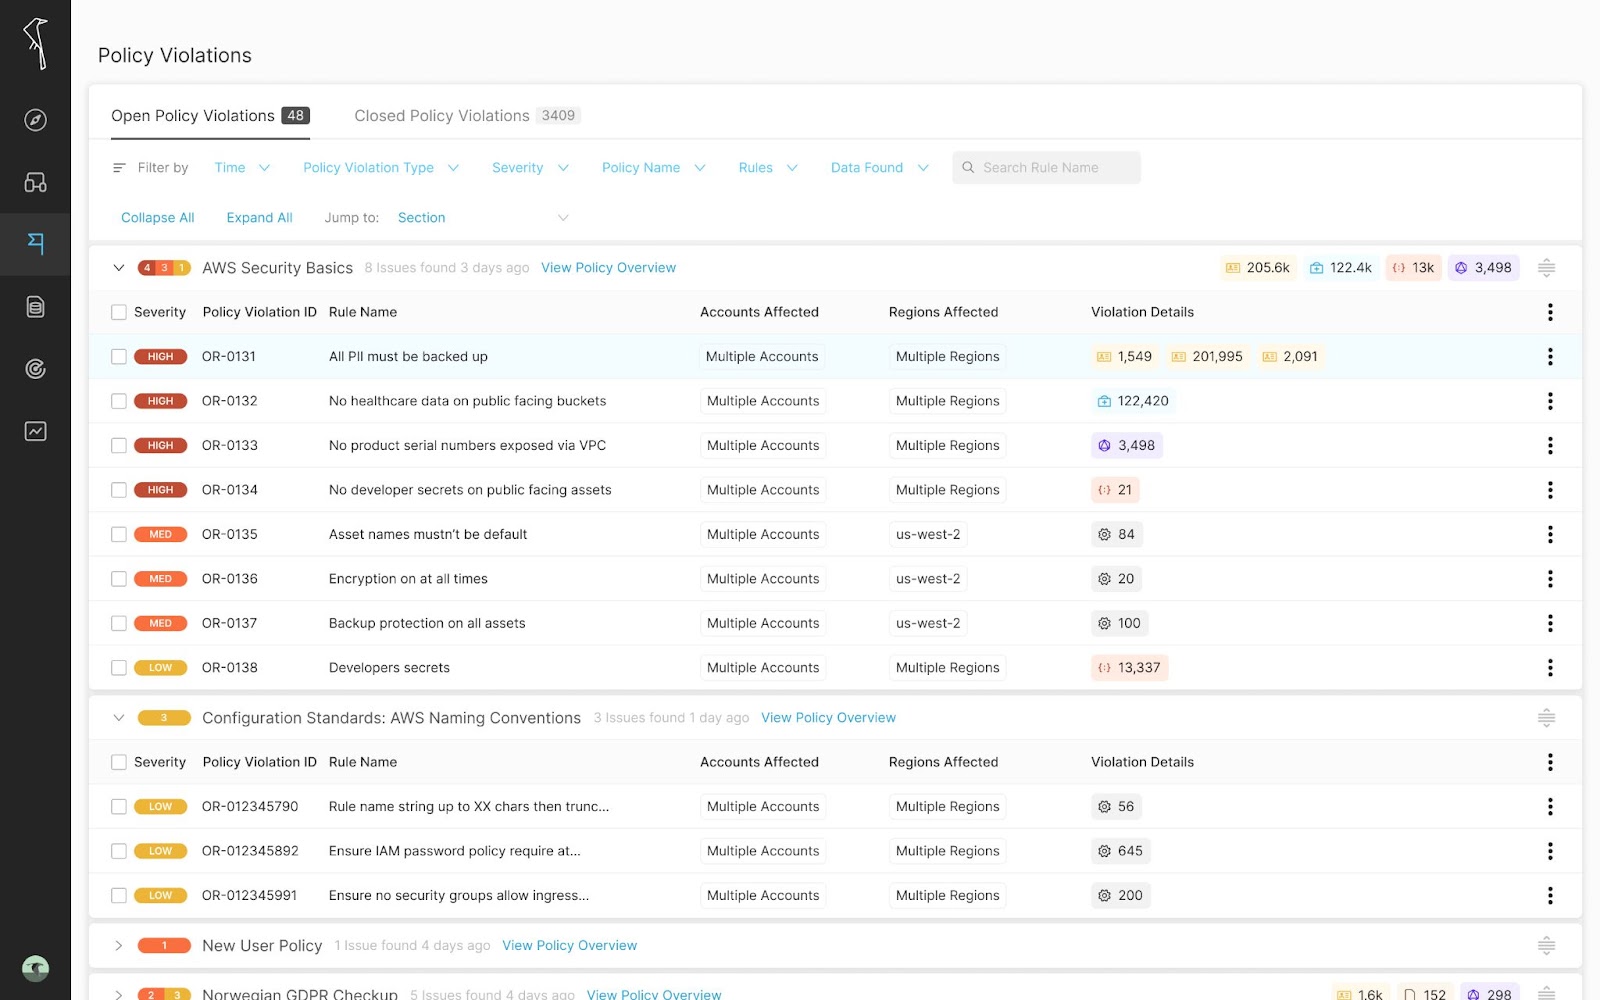
Open Raven Policies check against various rule conditions (data, region, config, backup, etc) and create alerts if any mismatches are found; like a rule that requires all personal data instances to be stored in buckets that are encrypted at-rest and backed up. To start, go to the navigation menu and select Scans, then Policies. On this page, you will see existing policies and their status, enabled or disabled. One of the default policies we make available is ‘AWS Security Best Practices.’ As you might have guessed, this policy contains rules sourced from AWS best practices, such as having all S3 buckets encrypted at rest and with MFA enabled. Modifying or creating a policy is as easy as selecting which rules you’d like to be included, a frequency to check for said policy, and the resources that should adhere to the rules (by type, account, region or configuration). While users are free to custom create their own rules, there are over 150 built-in rules to choose from or modify. To enable a policy, change the toggle from disabled to enabled. Alerts will be visible in Maps and in the Policy Violations section.
(Optional) Step 5. Connect to your workflow
Alerts about the Policies we’ve created are good but need to end up in the proper hands to be truly effective. Add alerts to your workflow by selecting your account icon, Settings, then select Integrations. Open Raven has 1-click integrations to send alerts to email, Slack, or 4me. Our EventBridge integration allows you to send all of the asset and violation events that happen in Open Raven to AWS. With our flexible Webhooks integration, you can configure Open Raven to send Policy Violations via HTTP requests to most URL endpoints.
When alerts are created, they include all discovered and mapped asset attributes, data intelligence gathered by S3 data scans, and the rule or rules in violation.

This rich context allows the recipient of the alerts to quickly assess the event and take next steps. If the resolution is as simple as adding a backup plan to the resource, this can be achieved directly within the Asset Details screen.
In the event of an outage or issue like ransomware, teams will have quick access to a Data Catalog and asset list to identify involved data, what needs to be recovered, available backups, and which escalations may be required (e.g., legal). This is far faster than the traditional workflow of first having to recover from all backups to then scan and discover what has been impacted—faster recovery is greater resilience.
And that’s it.
Our goal is to restore visibility and control over cloud resources and data for security teams, and this hands-free integration is another example of how we make that easier than ever.


